This time I am checking options, how I can run a Windows setup on one of the recent Apple Macs with M processor. My notebook is a M1 MAX, but my Mac Mini is still an Intel model. Should I upgrade to Mac Mini M2? For that I found the following Blog quite informative:
Lass dich einfach werben! Viele Anbieter ermöglichen es über einen Gutscheinecode das Win-Win-Prinzip zwischen einem Werber und dem Geworbenen herzustellen. Ich publiziere hier Promo-Codes, Vouchers, Referral-Codes -eben all das, was bei Annahme eines Angebotes dem „Neukunden“ einen Vorteil bietet. Schau einfach, ob was Passendes für Dich dabei ist.
What a drama! I found no way to assign the Windows 10 VM host a fixed IP address inside the QNAP Virtualisation Station. I was excercising the virtual switch and software switch settings up and down – to no avail. Finally I found the reason of this treason: Since the Windows VM was migrated from Parallels Desktop (via Virtual Box) it still had two other network cards in its belly. Of course, they were hidden in the Device Manager. But as they had this one fixed IP address already configured, it was not possible to add it to the new VirtIO interface. Once I had made these two other network cards visible, I deleted them and – voilá – the fixed IP address now could be assigned to the VirIO interface without any trouble. Before, only DHCP would work. Maybe this information helps someone who is also trying to get a VM with fixed IP addresses set up in QNAP virtualisation station.
I wanted to make sure I still can install colormunki Photo from the original CD, which I own(ed). I use an external CD-ROM drive for that purpose. Here on my Mac OS Catalina, it wouldn’t work. The Finder wasn’t showing any CD, disc utility would show there is something on the CD, but it was not possible to mount it.
Source: INTERNET ARCHIVE
The occurring error was: „Could not mount (com.apple.DiskManagement.disenter error 49153)“. WTF!
The result was the same – same error, no success. So I was continuing my search and came across the following website which described the exactly same error and hinted on the possible reason:
„Apple_HFS format may be the issue!“
And so it is – I connected my external CD drive to an older MacMini running Mac OS El Capitan. There was no problem in mounting the CD and copying the Mac OS install kit of colormunki photo from it.
For quite some time my Safari wouldn’t connect to my internet gateway, which is a Fritz!Box 7590, running with the IP 172.20.20.254. No chance to get to the admin interface, even though it was no problem at all from other systems. I didn’t put any effort into it since I could always connect from my iPad. Strange enough, the Mac OS Safari wouldn’t even show an error, but only say it couldn’t connect as if the target was not available at all.
But today I thought better of it – and found a way to make it work. Ok, how did I get there? I first installed Mozilla Firefox, and this browser had no problem connecting to the internet gateway – it only showed a warning that this site uses a self-signed certificate which is not trusted. So I downloaded the certificate in the Firefox browser (clicking the lock sign and downloading the PEM formatted certificate). Then I started keychain access on my Mac and did the drag and drop of the PEM cert into the keychain. Just make sure that you have selected Keychains = System and Category = Certificates. Thus the Cert started to appear in keychain, I double-clicked it and changed the trust to „trust all“. Authorized the changes and then started up Safari again.
What happened? Safari now had no issue to reach the Fritz!Box admin page! Great, success!
Receive Audio from Line-In and output it to Apple HomePod …
BabelPod is run on a Raspberry Pi, which I already use to connect my Fritz! based Actors (like heating and switches) to Apple HomeKit, including the Philips Hue items.
I still had such a TP-Link router in my vaults which once contributed usage metrics to the SamKnows EU project. Since I don’t want to operate it any longer, I thought of changing the router firmware to either the original TL-WR1043ND or a DD-WRT firmware.
This link provides a great walkthrough how to get it done:
Unfortunately it turned out that my MacBook doesn’t have telnet available anymore, after the upgrade to MacOS Catalina. Thus I had to install it first and chose to compile telnet from source for the MacOS Catalina:
Scrollout F1 is my major defence against all incoming spam waves. Using it for quite some time now, easily hosted at Hetzner, I have tweaked around some of the settings. Here I will document the change I needed to make to send email from my Mac OS infrastructure outgoing through the Scrollout F1 appliance.
Header View of Scrollout F1
Unfortunately, after updating the Scrollout Appliance once again (by entering
/var/www/bin/update.sh force
I ran into the following error when trying to send email:
I'm sorry to have to inform you that your message could not be delivered to one or more recipients. It's attached below.
For further assistance, please send mail to postmaster.
If you do so, please include this problem report. You can delete your own text from the attached returned message.
The mail system
<target@mailaddress.somewhere>: host my.mailserver [10.20.30.40] said: 530-5.7.0 Must issue a STARTTLS command first 530 5.7.0 For assistance, see Admin or contact +49351XXXXXXX. Please provide the following information in your problem report: Time: (Mar 09 22:24:08), Client: (192.168.30.40), Server: (my.mailserver). (in reply to MAIL FROM command) Reporting-MTA: dns; my.mailhost X-Postfix-Queue-ID: AFDDA182DF3F0 X-Postfix-Sender: rfc822; me@myaddress Arrival-Date: Sat, 9 Mar 2019 22:24:07 +0100 (CET)
The solution was a bit quirky, but I at least found out, that this problem can be resolved by changing a setting in main.cf of postfix. The line
smtpd_tls_security_level=encrypt
would have to be changed into
smtpd_tls_security_level=may
Once I changed it, the sending out of email did work again. Until, I used the Scrollout F1 frontend to change some settings. Then I was back at the start because postfix was running with TLS security level ENCRYPT again. So I thought that somewhere in F1 the defaults must be buried, and voilá, I found the following:
Means I found the defaults! Different ones for different protection levels ..
I changed the settings in these default files from „encrypt“ to „may“. Now the setting remain even when I change the configuration through the web frontend of F1 …
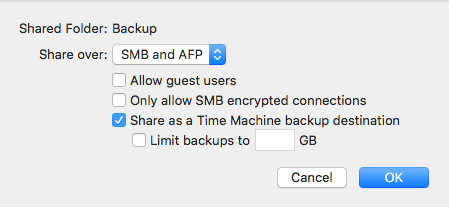
Since I moved my Promise Pegasus storage to the new Mac (which still runs High Sierra), I had to find a way to use Time Machine from my old MacMini. The old one still runs El Capitan. I read about the new File Sharing feature and created a folder which was shared and had under „Advanced Options“ the „Share as a Time Machine backup destination“ turned on. Still, I couldn’t select this target folder on my old MacMini.
After reading the discussion at apple.com, I thought I should enable AFP too, which I had disabled before. Then it looked like this:
File Sharing Details – Advanced Options
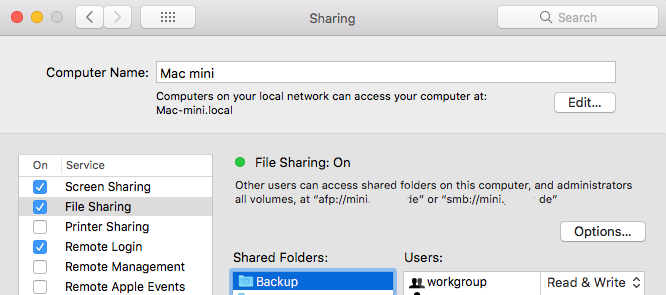
As the Apple Discussions article described, you should connect to the Backup folder via AFP. But Finder (Command+K) wouldn’t allow me to do so. So I found out that I didn’t have AFP enabled at all, you have to select it in the major window for File Sharing as you can see in the following screen shot:
MacOS -> System Preferences -> Sharing
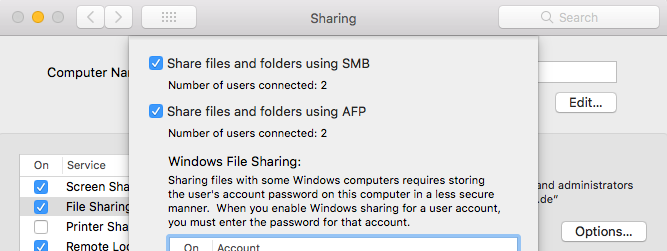
Thus I went to „Options“ and enabled both SMB and AFP to allow my old MacMini with MacOS El Capitan to use the TimeMachine feature from MacOS HighSierra (or Mojave in the near future).
MacOS -> System Preferences -> Sharing -> Options
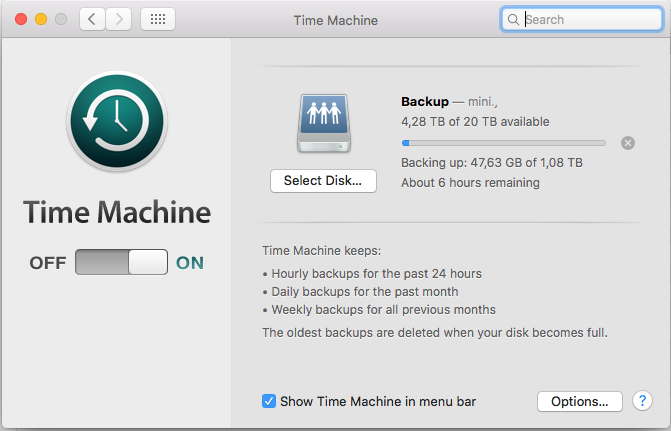
After enabling AFP, I was able to connect to the shared folder and afterwards select the folder from the newer MacOS to backup my older MacOS based MacMini.
TimaMachine on MacOS El Capitan now uses the backup folder from the MacOS HighSierra/Mojave
Today I set up my system with Mac OS High Sierra and again encountered issues while using my Kyocera printer to scan to a folder on my Mac.
The initial steps were to enable file sharing via SMB (without encryption!) and then set up the Kyocera as discussed in several blogs.
Finally when it was working, I noticed that it would save everything under the username I have chosen, but all other users were not able to open the scanned files. So, that was the typical user – group – rights issue in a SMB connection. What solved my issue was posted on a website and reads:
Firstly enable ACL permissions for SMB shares with the following command.
Then set up inheritance permissions on the parent holder with the following command. This should recursively go through your share and apply the relevant permissions.